Requirement List
| Technical Paper Presentation Length | 10 minutes |
| Posters Fast-Forward Length | 30 seconds |
| Resolution | 1920×1080 |
| File Format | mkv or mp4 (h.264 or h.265) |
| Deadline | 05 May 2022 (23:59 PDT) |
| Technical Paper Submission Link | https://forms.gle/BXxUtMRzfKhG8Dcp8 |
| Poster Submission Link | https://forms.gle/zktnK6rnVjJCsjif9 |
| Captioning | Please submit a caption file (.srt) with your video, as described below |
Presentation Template
We have provided a template to use for your presentation. While you are not required to use this for your entire presentation, we kindly ask that you use the first and last slides of this template for your presentation.
https://docs.google.com/presentation/d/1PLP6nr2DkfSlgcGfemjGkJu0J-PBP5b0TOM3hDCitko/edit?usp=sharing
Tools
There are many tools that can be used for recording a presentation. We recommend a tool called OBS (https://obsproject.com/). OBS is a cross-platform, free, open-source tool for recording and streaming video. OBS is fairly easy to use and is well documented online. It will let you record your desktop as well as several webcams at the same time.
Layout
For technical paper presentations, we have provided a template to use for your presentation slides. Please note that the lower-right-hand corner has been marked, do not cover this region with other content. Presentations tend to be more engaging if we can see the presenter speaking at the same time. Use the marked region of the slides to overlay your “talking head” video. If you are not comfortable recording a video of yourself speaking, please consider placing a still image of yourself, or, your co-authors in this region. The aspect ratio of this video or image is 16:9.
To record both slide interaction and your spoken presentation simultaneously in OBS:
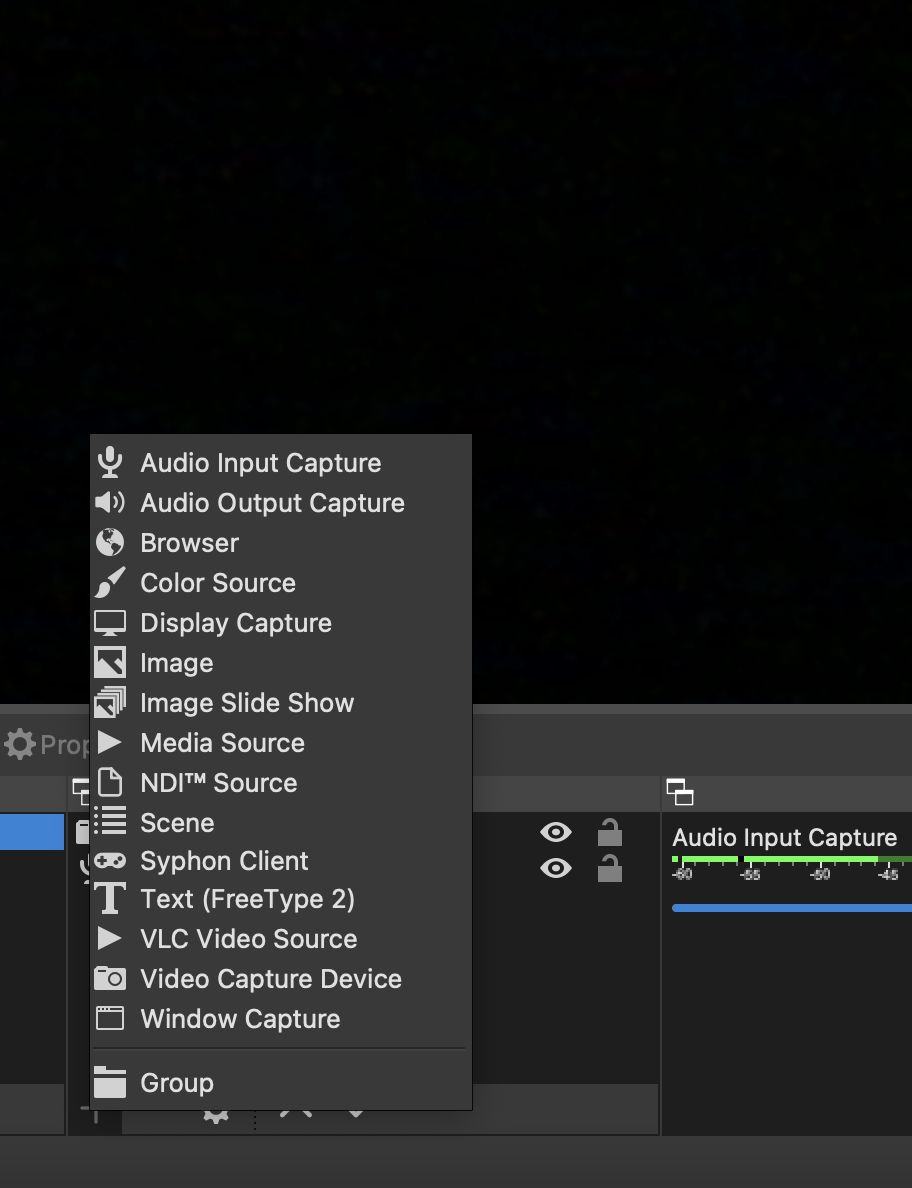
- Click on the + under Sources and add the following:
- an audio input device; this will be either from your webcam, or, a separately-attached microphone
- a video input device; this will be your webcam or other video recording device
- a display capture; this will allow you to record your screen, or, a portion of it
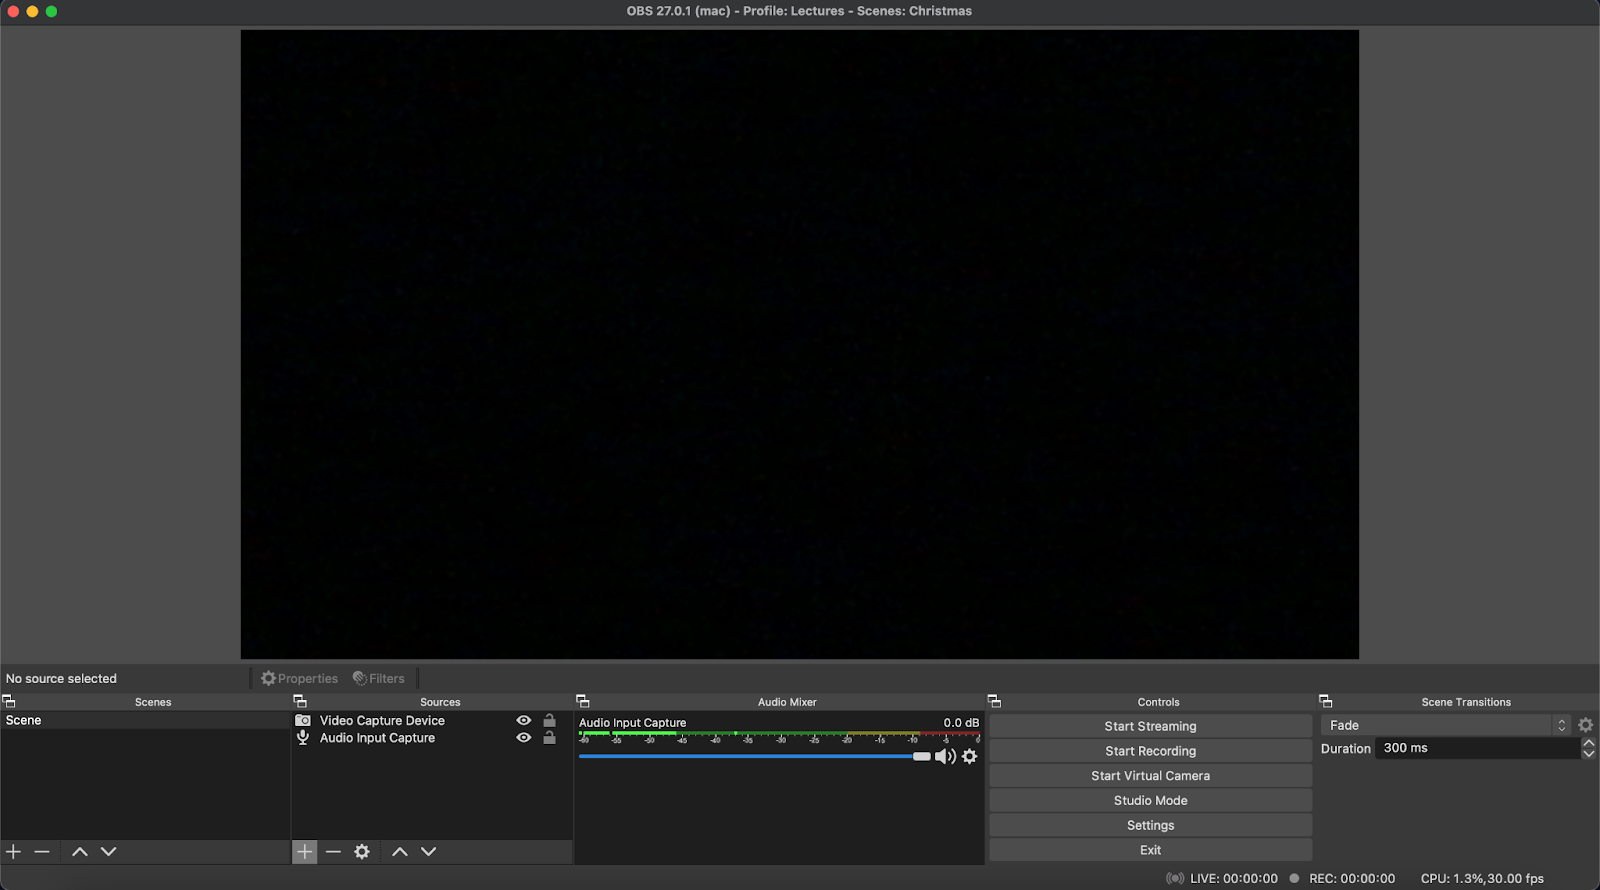
- Once the appropriate sources have been added, you can adjust the shape/position of those elements. Under Sources, click on the desired item. You should now be able to manipulate the size and position of the visual element in the scene above. Move and resize the video capture to fit into the provided box/region of the presentation.
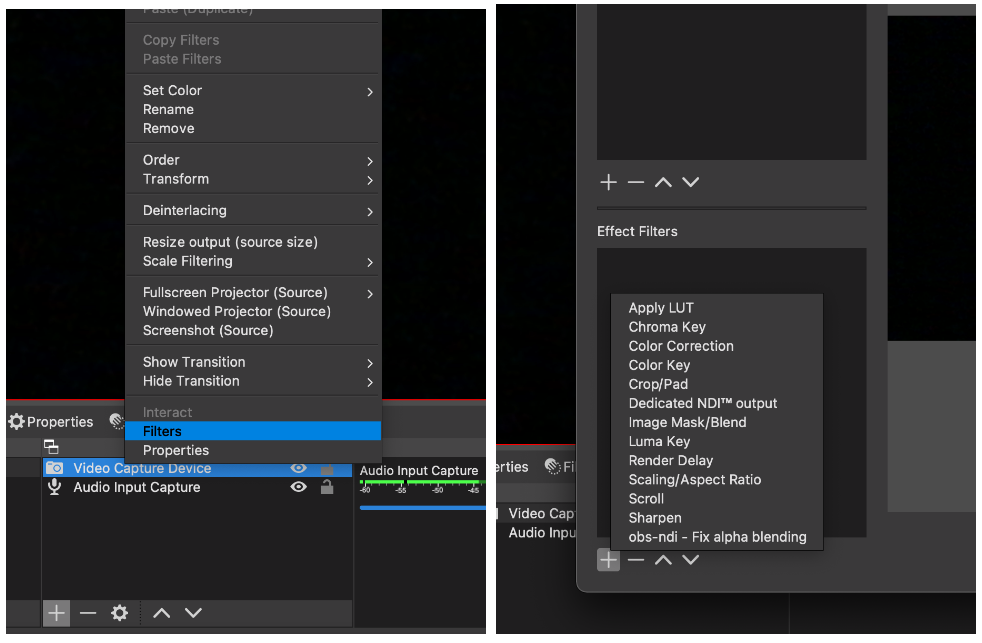
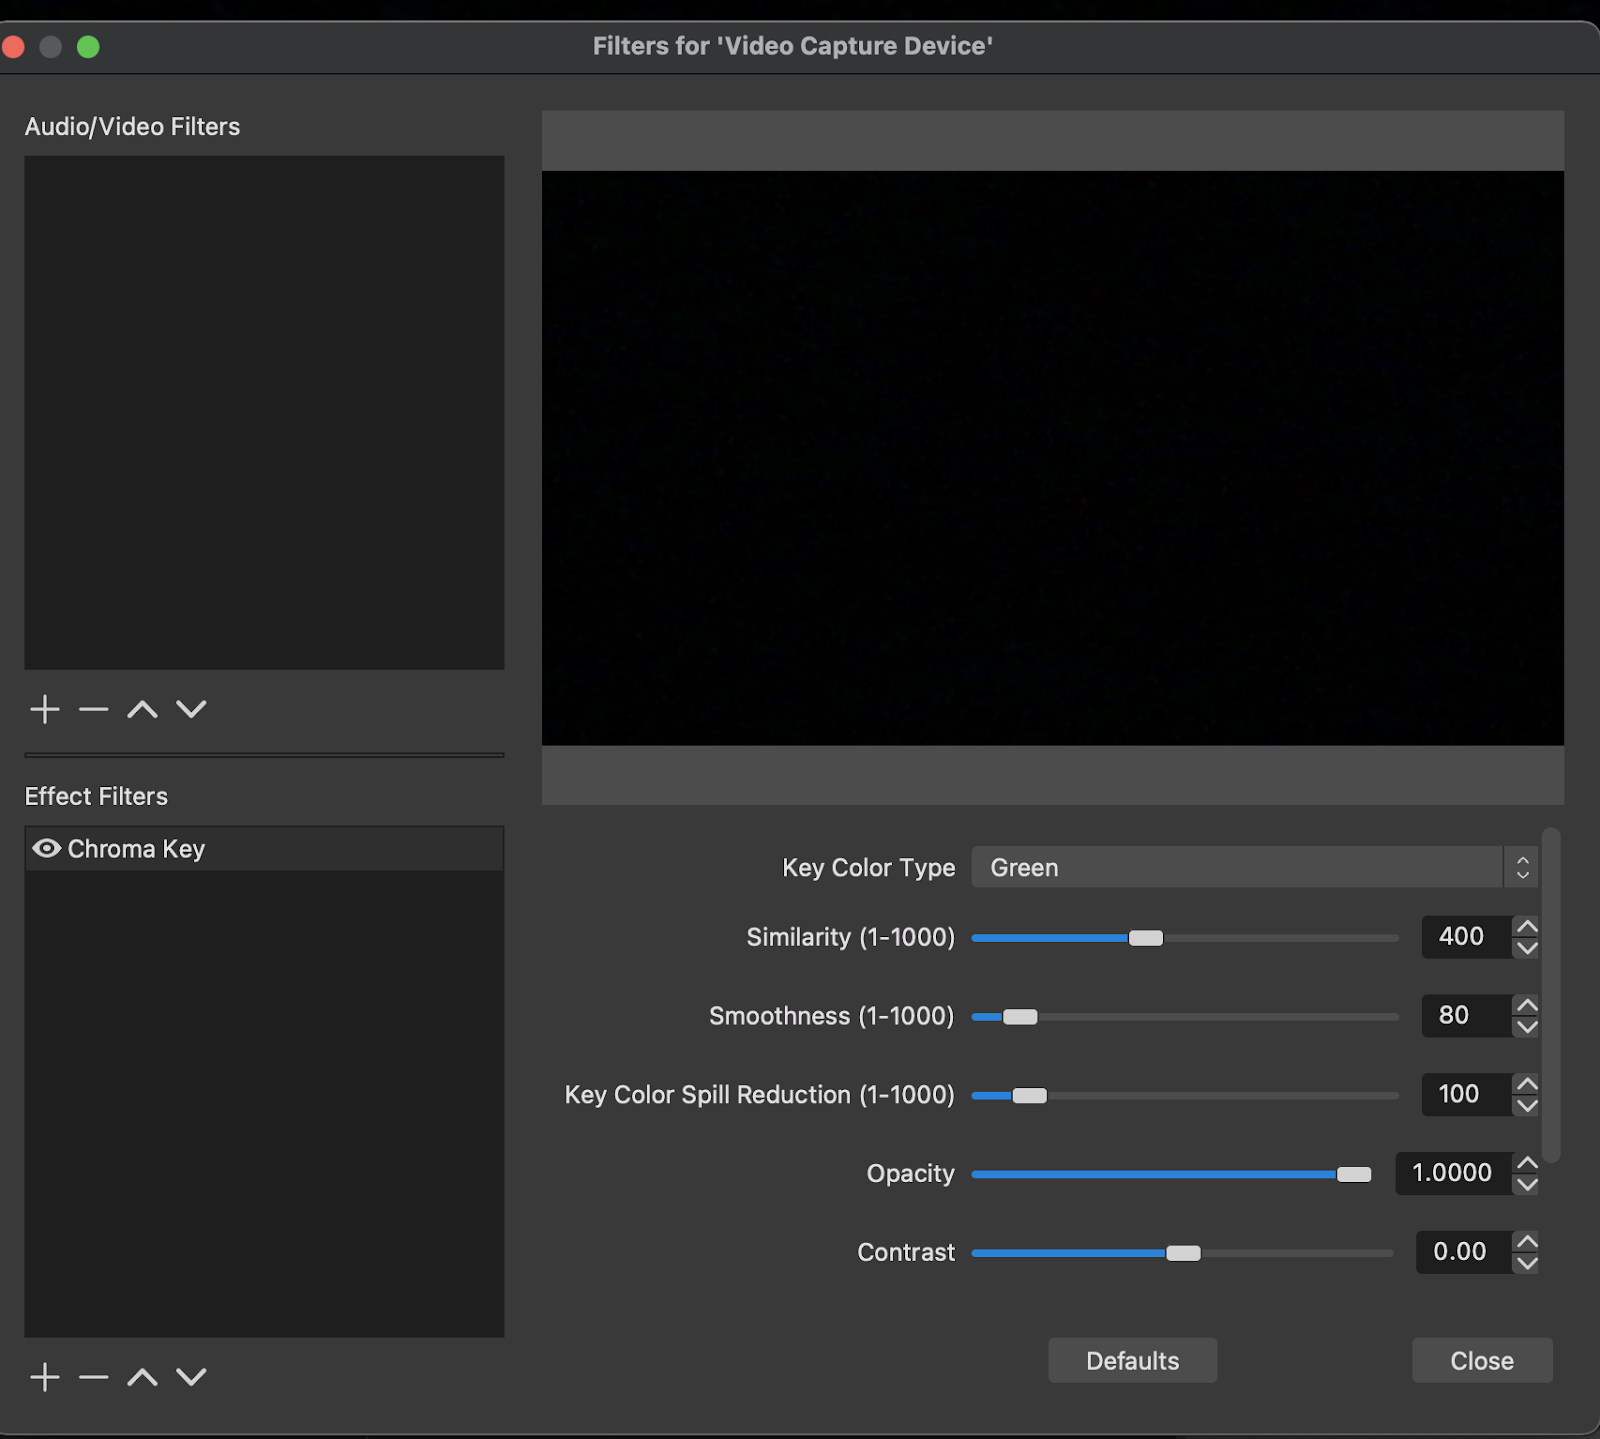
- Green Screen. If you have access to a green screen, you can enable chroma keying by right clicking on the video input device under Sources, and selecting Filters. Under Effects, click on the + and select Chroma Key.
- You can adjust the sensitivity after adding this filter.
You can also use OBS to combine pre-existing video content with live content.
Video Quality
It is important that your slides are clearly visible in your presentation video. We request that you record your presentation at a minimum resolution of 1080P. Your webcam/camera does not need to support this resolution as your “talking head” will be smaller than 1080P (refer to the marked region of the provided slide template).
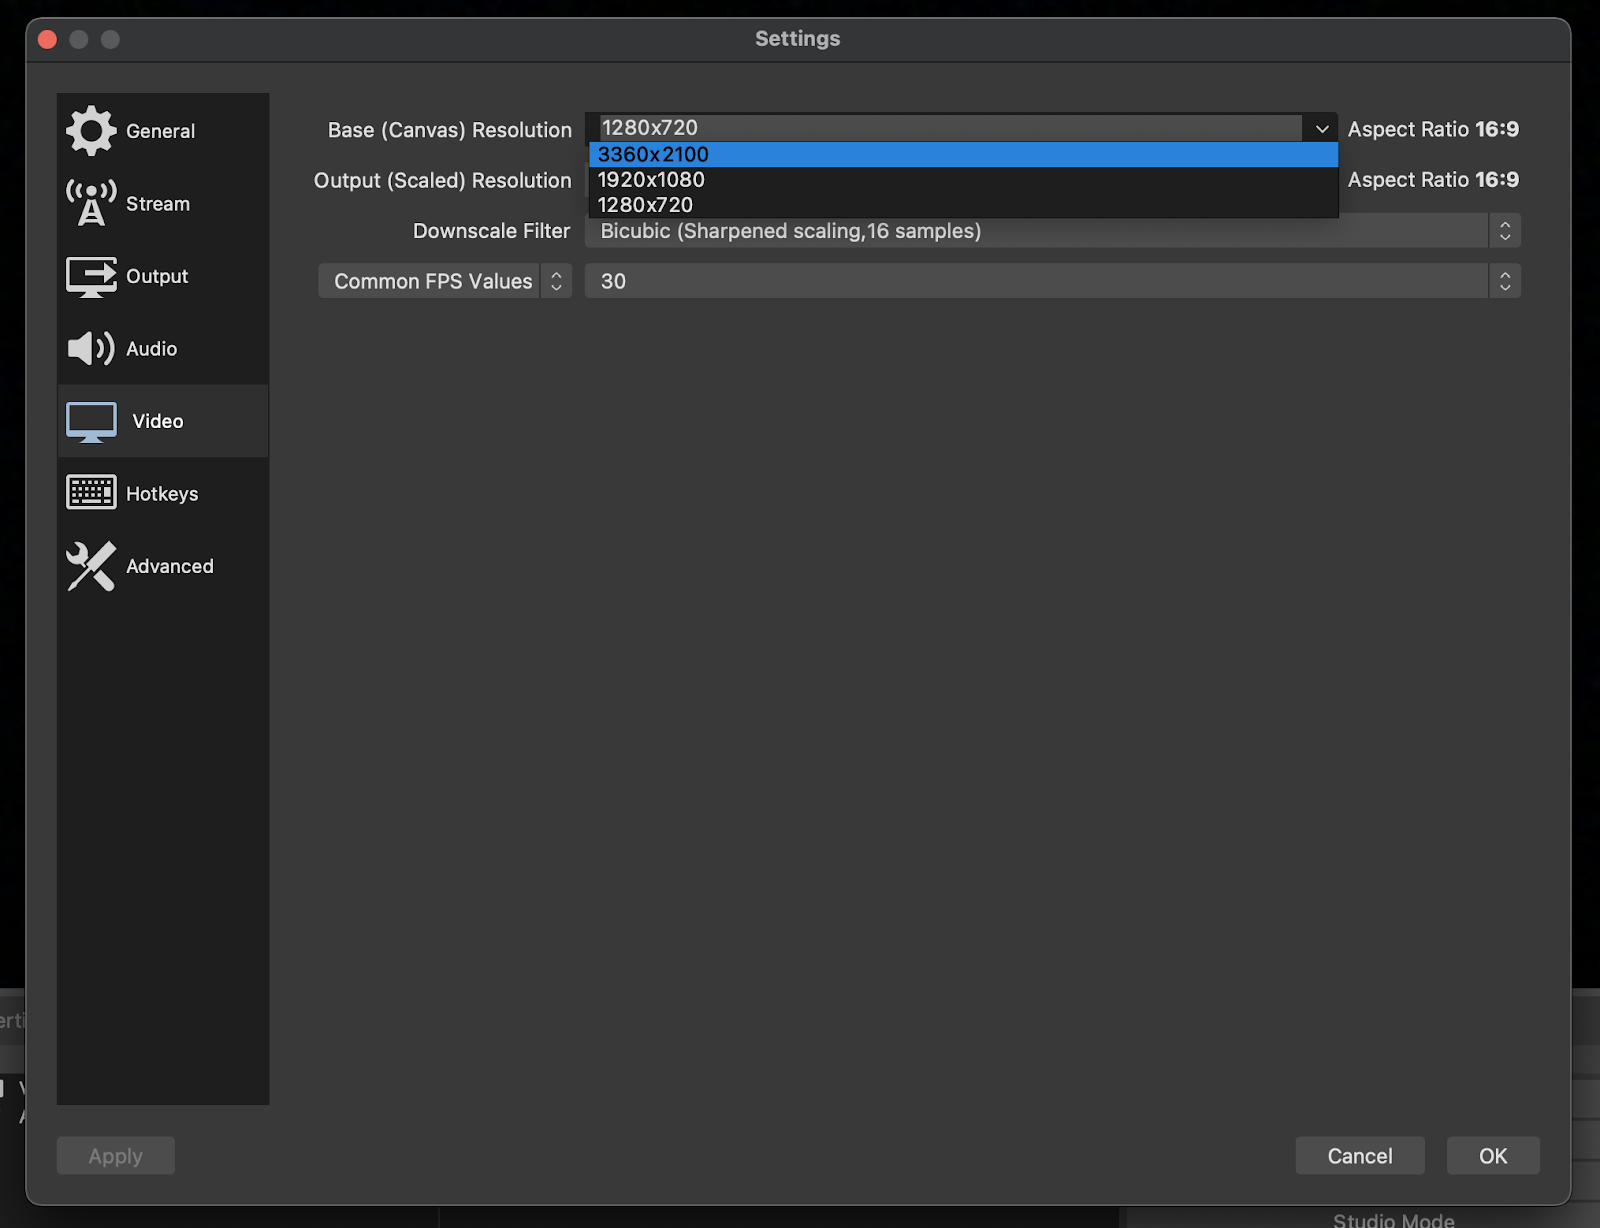
To set the recording resolution in OBS, open the Settings or Preferences. Under Video, you can choose the appropriate resolution.
Audio Quality
More important than video quality, is audio quality. If possible, record your presentation in a quiet space that does not have an echo. If you are using a webcam microphone, speak clear and loud. Generally speaking, a separate, external microphone will provide better audio quality. We recommend that you enable audio filtering in OBS (for example, Noise Suppression with RNNoise)
Audio and Video Editing
Numerous tools can be used to edit your presentation. DaVinci Resolve (https://www.blackmagicdesign.com/ca/products/davinciresolve/) is a free, professional-grade editing tool available for Windows and Mac OS. It is also available for Linux, however, it can be challenging to install and run on this platform. Within tools like Resolve you can composite audio and video layers, edit colour, and perform various VFX tasks.
You can edit the audio in your presentation by using a tool such as Audacity (https://www.audacityteam.org/), a cross platform, free and open source tool. Audacity can be used to remove background noise, adjust tone, increase volume, etc.
Captions
We request that you provide a caption file for your video. This will make your presentation more accessible to those with difficulties hearing, and to individuals for whom English is a second language.
You can create your subtitle file in a number of different ways:
- use Youtube’s automatic captioning
- Adobe Premiere
- other captioning service
Regardless of the method used to create your captions, we request that you edit them for accuracy and punctuation prior to submission.
General Advice and Notes
- It is important to film in a well-lit environment. Low lighting can create a lot of noise in your video.
- A second monitor can make the recording process significantly easier, allowing your presentation slides to be on one screen and OBS on the other.
- OBS may look different and have different menu labels under different operating systems. We have observed notable differences between OBS on MacOS and Linux.
- If you wish to include a video demonstration in your presentation, consider adding it through OBS under “Add Media Source”. This allows you to place/scale the video. To “start” the video, make it visible. Playing videos through OBS will ensure that sound is captured. If you play videos through your desktop on MacOS and use Display/Screen Capture, it will not capture any sound from that video.
- If you have other tasks running while recording, it is possible that your video and audio will be out-of-sync.
- It often takes more than one take to create a video that you are happy with. Be prepared to do several recordings. Writing a script can help reduce the number of takes!